
Your refrigerator runs twenty-four hours a day, three hundred sixty-five days a year. It is the hardest-working appliance in your home, and it never gets a break. While you sleep, while you vacation, while you are at work, it hums away in the corner, keeping your milk cold and your vegetables crisp. And every hour it runs, it draws electricity. The average refrigerator costs between $150 and $300 per year to operate, depending on size, age, and efficiency. But for many homeowners, that number is 30% higher than it should be. The culprit is not a broken part or a faulty thermostat. It is dust.
Refrigerator coils — the black metal tubes on the back or bottom of your fridge — are the engine’s radiator. They release the heat that the cooling system extracts from inside the compartment. When dust accumulates on those coils, it acts like insulation, trapping heat where it needs to escape. The compressor works harder, runs longer, and draws more electricity to achieve the same temperature. Over a year, dirty coils can add $50 to $100 to your electric bill for a single appliance.
Why Coils Get Dirty So Fast
Refrigerator coils are dust magnets for a simple reason: airflow. The compressor fan pulls air across the coils to dissipate heat. That air carries pet hair, carpet fibers, cooking grease, and general household dust. In homes with pets, the accumulation is even faster. Animal hair is light, electrostatically charged, and perfectly designed to cling to metal fins. A household with two dogs can see significant coil buildup in as little as three months.
The location of the coils determines how quickly they clog. Older refrigerators and many current models have coils on the back, exposed to the wall gap where dust settles and air circulation is poor. Newer models often place coils underneath the unit, protected by a grille but exposed to floor-level dust and kitchen debris. Both locations are out of sight, which means they are out of mind. You do not see the dust accumulating, so you do not clean it until the refrigerator starts showing symptoms.
Kitchen grease adds a sticky layer that standard dust cannot match. Cooking releases airborne fats that settle on cool surfaces, including refrigerator coils. Once grease coats the fins, it traps subsequent dust layers more effectively than bare metal. The result is a dense, felt-like mat that air cannot penetrate. This is why kitchen refrigerators fail faster than garage or basement units — the environment is actively hostile to heat exchange.
The Hidden Costs Beyond the Electric Bill
The immediate cost of dirty coils is higher electricity consumption. The compressor runs longer cycles and draws more power per cycle. But the secondary costs are often worse. A compressor that works harder wears out faster. The average refrigerator compressor lasts 10 to 15 years, but dirty coils can reduce that lifespan by 30% or more. A new refrigerator costs $800 to $2,000. A coil cleaning costs nothing but time.
Overheating also damages other components. The condenser fan motor, which pulls air across the coils, strains against the dust barrier and burns out prematurely. The compressor itself can overheat and trip the thermal overload switch, causing intermittent cooling failures that spoil food before you notice the temperature rise. These symptoms — warm spots in the refrigerator, ice buildup in the freezer, constant running — are often misdiagnosed as thermostat or refrigerant problems when the real issue is simply airflow restriction.
In extreme cases, the compressor can fail catastrophically. The motor draws excessive current to overcome the heat load, overheats, and seizes. At that point, you are not just cleaning coils. You are replacing the heart of the refrigerator or buying a new unit entirely.
The Dollar Test
Pull your refrigerator away from the wall and look at the coils. If you can see a visible layer of dust, your refrigerator is working harder than necessary. If the dust is thick enough to write in, you are likely paying an extra $5 to $10 per month in electricity for a single appliance. Over five years, that is $300 to $600 in wasted energy — enough to buy a new refrigerator.
How to Clean the Coils Safely
Cleaning refrigerator coils is not complicated, but it requires care. The coils are thin aluminum or copper fins that bend easily. Damage them, and you reduce airflow permanently. Follow this sequence for safe, effective cleaning.
Step 1: Unplug the Refrigerator
Always disconnect power before cleaning. This protects you from electrical shock and protects the compressor from damage if you accidentally bump the fan or wiring. If your refrigerator is hardwired or the plug is inaccessible, turn off the circuit breaker. Do not skip this step.
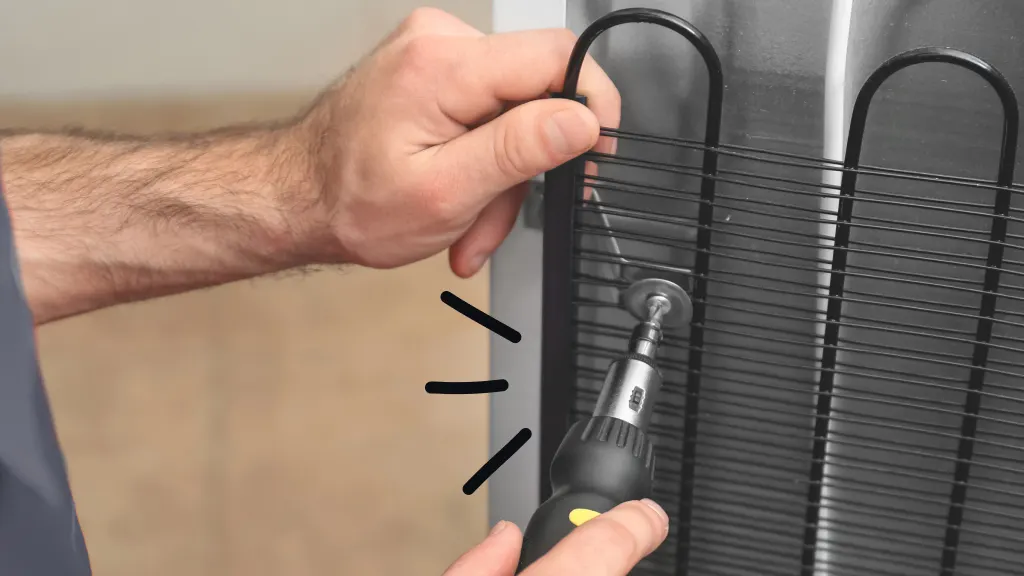
Step 2: Locate the Coils
Back-mounted coils are visible as a black grid on the rear of the unit. Bottom-mounted coils are behind a grille at the front base of the refrigerator. Some models have a removable panel that snaps off with gentle pressure. Others require a screwdriver. Check your owner’s manual for the specific location and access method. If you do not have the manual, search online using your model number.
Step 3: Remove Loose Debris
Use a vacuum with a brush attachment or a crevice tool to remove the bulk of dust and hair. Work gently — the fins bend under pressure. Move the nozzle in the direction of the fins, not against them. For bottom-mounted coils, a long, flexible dryer vent brush can reach deep into the compartment where the vacuum cannot.
Step 4: Deep Clean the Fins
For grease or stubborn buildup, use a coil cleaning brush — a long, soft-bristled tool designed specifically for refrigerator and HVAC coils. These brushes reach between fins without bending them. Alternatively, a soft paintbrush or a clean toilet brush works in a pinch. Do not use wire brushes, scouring pads, or anything abrasive. The fins are thin and damage easily.
If the coils are coated with greasy residue, spray a foaming refrigerator coil cleaner onto the fins and let it sit for five minutes before brushing. These cleaners dissolve grease without requiring water, which is important because water and electrical components do not mix. Wipe away the foam with a dry cloth and vacuum again to remove loosened debris.
Step 5: Clean the Fan and Surrounding Area
The condenser fan, usually located near the compressor, also accumulates dust. A dirty fan blade is unbalanced and inefficient, reducing airflow even if the coils are clean. Wipe the blades with a damp cloth and check that the fan spins freely. If it is stiff or noisy, the motor bearings may be failing — a separate issue that requires professional repair.
Step 6: Reassemble and Restore Power
Replace any panels or grilles you removed. Plug the refrigerator back in or restore power at the breaker. Listen for the compressor to start — it should hum steadily, not strain or rattle. The fan should spin smoothly without clicking. If you hear unusual noises, recheck that nothing is touching the fan blades or wiring.
The Coil Cleaning Kit
You do not need expensive tools. A vacuum with a brush attachment, a coil cleaning brush ($10 at hardware stores), and a can of foaming cleaner ($8) are sufficient for most refrigerators. The total investment is under $20. The return is $50 to $100 per year in electricity savings, plus extended appliance life. No other home maintenance task offers a better cost-to-benefit ratio.
How Often to Clean
The standard recommendation is every six months. But the actual frequency depends on your environment. Use this schedule as a starting point and adjust based on what you find.
| Household Type | Cleaning Frequency | Why |
|---|---|---|
| No pets, low dust | Every 9-12 months | Minimal airborne debris accumulation |
| With pets | Every 3-4 months | Pet hair clings to coils and traps dust |
| High dust or construction nearby | Every 2-3 months | Environmental dust loads are excessive |
| Heavy cooking, no range hood | Every 4-6 months | Grease coating accelerates buildup |
| After home renovation | Immediately after | Construction dust is dense and abrasive |
Set a recurring reminder on your phone. The twice-a-year schedule — spring and fall, aligned with daylight saving time changes — works for most households. Tie it to another maintenance task, like changing HVAC filters or checking smoke detector batteries, so it becomes part of a routine rather than a separate chore you forget.
Signs Your Coils Need Immediate Attention
Even with a schedule, watch for these warning signs that indicate urgent cleaning is needed:
- The refrigerator runs constantly or cycles on and off more frequently than usual. This is the compressor struggling to maintain temperature against restricted heat exchange.
- The exterior feels warm or hot to the touch, particularly on the sides or near the base. Excess heat means the coils are not dissipating it efficiently.
- The freezer accumulates frost or the refrigerator compartment has warm spots. Poor cooling consistency indicates the system is not reaching target temperatures.
- You hear clicking or buzzing from the compressor area. The thermal overload switch may be tripping due to overheating.
- Your electric bill spikes without explanation, especially in summer when the refrigerator works hardest.
If you notice these symptoms and the coils are clean, the problem may be a failing compressor, low refrigerant, or a faulty thermostat. At that point, call a technician. Cleaning will not fix mechanical failure.
The Bigger Picture
Refrigerator coil cleaning is the perfect example of invisible maintenance. You do not see the dust, so you do not think about it. You do not feel the extra electricity cost month to month, so it does not motivate action. The appliance keeps running, so there is no urgent failure to address. The degradation is gradual, silent, and expensive.
A homeowner who cleans their coils twice a year will spend less on electricity, replace their refrigerator less often, and avoid the emergency purchases that happen when a unit fails during a holiday weekend. The task takes 15 minutes. The return is measured in years of extended life and hundreds of dollars in avoided costs. It is not exciting maintenance. It is smart maintenance. And it starts with pulling the refrigerator away from the wall and looking at what you have been ignoring.
Related Articles
- Why Grout Darkens Even After Regular Mopping
- How to Clean Gutters Safely Without a Tall Ladder
- Simple Guide to Washing Machine Care for Longer Use
- Easy Ways to Remove Hard Water Marks From Glass
- Why Garbage Disposals Smell and How to Freshen Them
- How to Clean Air Vents Without Spreading Dust Around
- Common Reasons Laundry Feels Damp After Drying Fully
Sources and References
- Mr. Appliance. “How to Clean Refrigerator Coils.” 2025. https://www.mrappliance.com/expert-tips/how-to-clean-refrigerator-coils/
- Family Handyman. “How to Clean Refrigerator Coils.” 2025. https://www.familyhandyman.com/project/how-to-clean-refrigerator-coils/
- Good Housekeeping. “How to Clean Refrigerator Coils.” 2025. https://www.goodhousekeeping.com/home/cleaning/tips/a25736/how-to-clean-refrigerator-coils/
- Bob Vila. “How to Clean Refrigerator Coils.” 2025. https://www.bobvila.com/articles/how-to-clean-refrigerator-coils/
- The Spruce. “How to Clean Refrigerator Coils.” 2025. https://www.thespruce.com/how-to-clean-refrigerator-coils-1908126

Elena Rodriguez is a certified home inspector and DIY educator specializing in maintenance routines, home repairs, decor optimization, office setup, and smart device integration. She helps homeowners tackle projects with confidence using tools they already own. Her writing focuses on actionable steps for cleaning, fixing, arranging, and automating. Elena holds a degree in Construction Management and contributes to home improvement resources regularly.